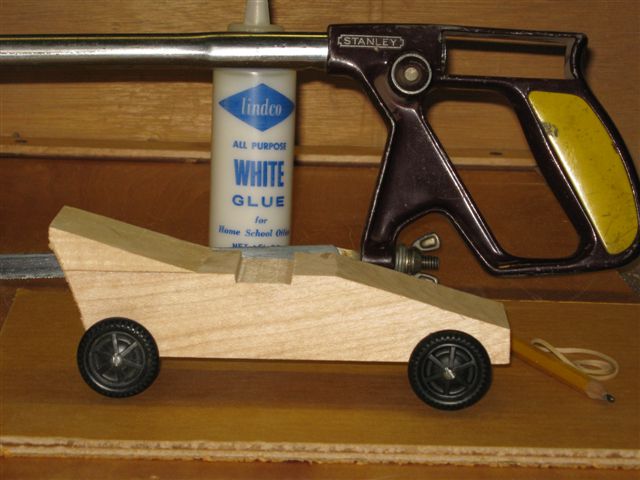
A Pinewood Derby® is an appointment an adult keeps with their child to do something together. Even if you’ve never cut a piece of wood in your life, you and your child can successfully build a cool looking Pinewood Racer.
You only need a few basic tools to build your Racer.
a. Pencil
b. Ruler (or any straight edge)
c. Small clamp
d. Small saw (A hack saw works really well. It leaves a nice smooth surface. Try to use a blade with 18 teeth per inch.)
e. Two small pieces of scrap wood or cardboard. One to protect the wood from being dented by the clamp and another to protect the surface you will be working on.
f. White glue (any brand will work)
g. Rubber bands to hold the wood together while the wood dries
h. Place to work. The Pinewood Racer, shown in the following pictures, was built in our kitchen using our slide out cutting board.
i. Sandpaper (S&W Crafts has a perfect
sanding set for what you need.)
Step 1
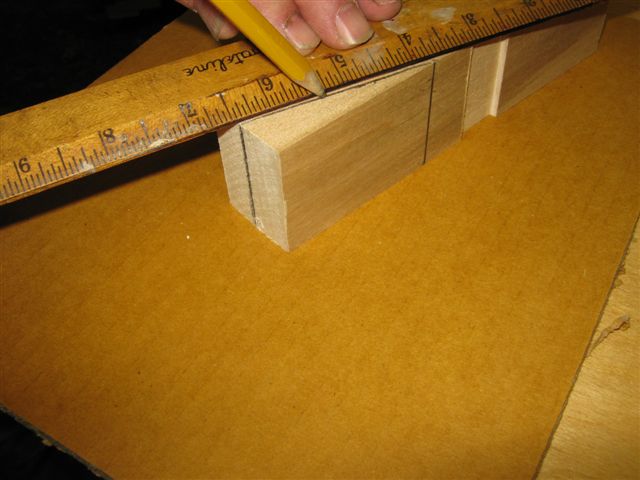
Using a ruler, draw three lines on the block to create a wedge shape. The small wedge you’ll be cutting off the front of the car will be used to create the back of the car. Look carefully at the picture in step 3. Draw the first angled line on the side. Be sure the line ends before the seat cutout. If you don’t have a seat cutout on your car make sure the cut is no further than halfway. Next, draw a line across the end of the block and across the top. These three lines will help you aim the saw straight.
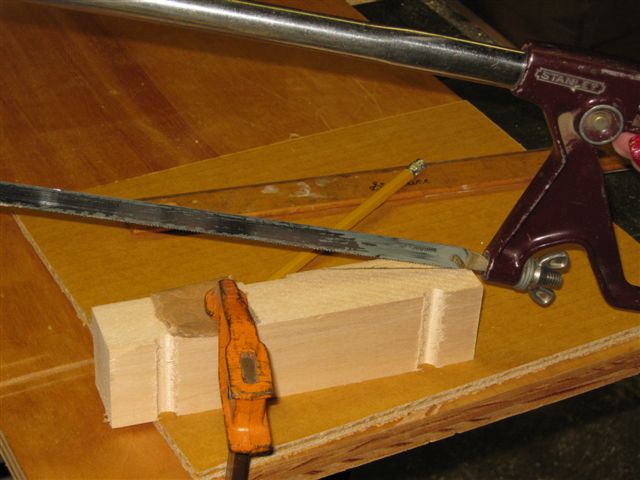
Step 2
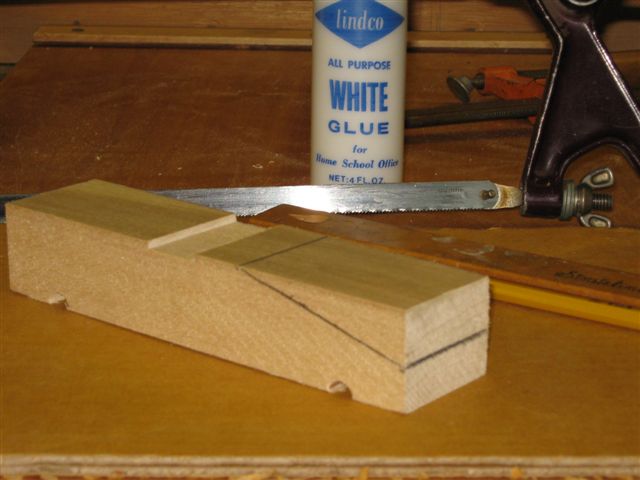
Put a small piece of scrap wood, or cardboard, between your block of wood and your clamp. This will prevent the clamp from denting your car. Since this Racer was built in our kitchen, I put a small piece of cardboard in between the Racer and the cutting board. This will help prevent you from damaging your cutting board. Notice in the picture, a hack saw is being used to cut the wood. Cut the wood slowly. (Tip: The slower you go the faster you’ll finish the cut.) After cutting the wood partway, stop and allow your child to finish. How much your child cuts in up to you. Your child may be better at cutting than you think.
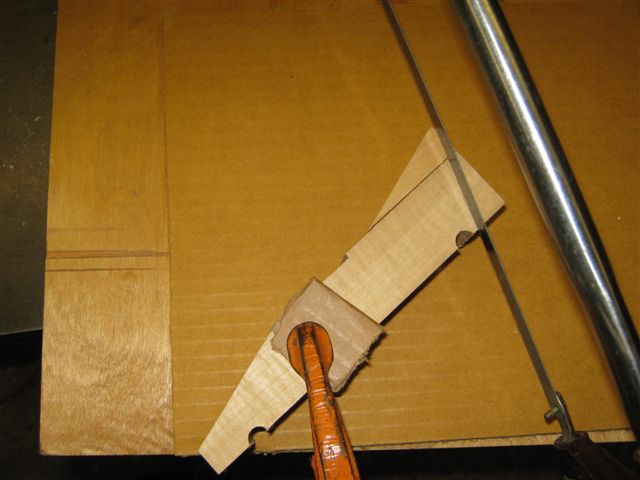
Step 3
Glue the wedge you just cut off to the back of your Racer. Apply a thin coat of glue to both pieces of wood. To help the glue dry faster, rub the two pieces of wood together vigorously. This will warm up the glue and squeeze out the excess. Then, wrap with rubber bands and let dry for at least thirty minutes.
Step 4
Cut the back of the Racer at a slight angle.
Step 5
You now have a cool looking Pinewood Racer.
Round off all the edges. Sand the car smooth. Apply any type of paint you are familiar with.
We recommend getting one of our
acrylic paint kits, putting newspaper on the kitchen table, leave the kitchen and let your child paint the Racer by him/herself.
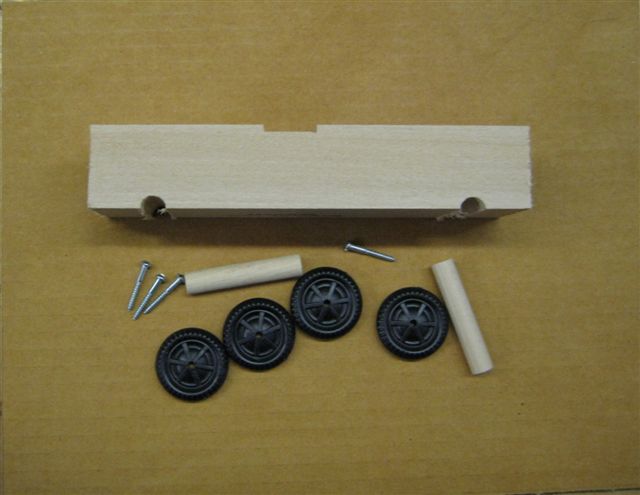
Screw the wheels to the wood dowel axle. Press the axle assemblies into the grooves in the bottom of the car. A little tape may be needed to hold the axle in place. Roll the car on a flat surface to see if the car goes straight. Rotate the axle assembly in the groove about 1/8 of a turn,then try rolling the car again.Continue adjusting the axle assemblies til the cars goes straight. Use 2 or 3 drops of glue to hold the axle in place.
After surviving your first Pinewood Derby
®, you may want to consider getting a
polishing kit for next year’s car. Or, if you’re feeling a little ambitious, get a polishing kit now!